When your power flickers out, that trusty 2500-watt electric generator sitting in the garage suddenly becomes the most important piece of equipment you own. But what happens when it decides to go on strike, leaving you stranded in the dark? Nothing's more frustrating than a generator that won't start, runs rough, or fails to deliver the power you need.
That's where this guide comes in. We’re going to walk through Troubleshooting Common Issues with 2500 Watt Electric Generators like seasoned pros, empowering you to diagnose and fix problems with confidence. No more fumbling in the dark—just clear, actionable steps to get your generator purring again.
At a Glance: Your Generator Troubleshooting Toolkit
- Won't Start? Check battery (aim for 12.6V+), fuel freshness (no older than 30 days), oil levels (safety shutdown trigger), and spark plugs.
- Runs Rough/Sputters? Focus on the carburetor (likely clogged jets), governor system, and ensuring your load isn't too heavy.
- Low/Unstable Power? Suspect the Automatic Voltage Regulator (AVR), electrical connections, or worn alternator brushes.
- Overheating? Clear blockages, check fluid levels, and lighten the load.
- Excessive Fuel Use? Look for leaks, check engine tuning, and ensure you're running it efficiently (70-80% load).
- Noises/Vibrations? Tighten mounts, inspect bearings, and check belts.
- Smoke Signals? Black smoke means incomplete combustion; white smoke suggests compression issues or leaks.
- Safety First: Always use transfer switches, ground properly, and install CO alarms—generators kill 400+ annually in the US from CO poisoning.
Understanding Your 2500-Watt Workhorse: Why It Matters
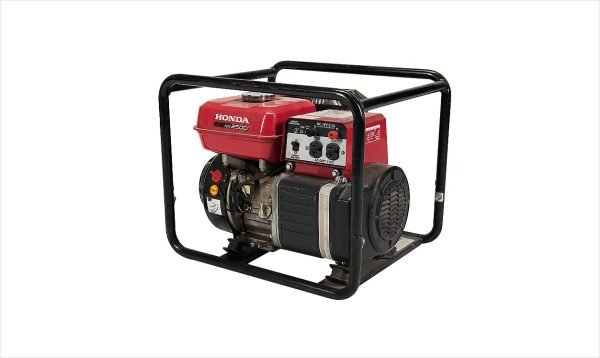
A 2500-watt generator is a popular choice for everything from tailgating and camping to providing essential backup power during outages. It's powerful enough to run a few critical appliances—think refrigerator, some lights, a fan, or even a small window AC unit—without being overly bulky or fuel-hungry. But like any hard-working machine, it can develop quirks. Knowing how to troubleshoot these common issues yourself can save you time, money, and a lot of headaches, ensuring your power source is reliable when you need it most. For a broader look at models and features, you might want to explore 2500 watt electric generators that fit your specific needs.
Let’s dive into the specifics of what might be ailing your generator and how to fix it.
Problem 1: The Silent Treatment – When Your Generator Won't Start
This is perhaps the most common and frustrating issue. You pull the cord or hit the start button, and... nothing. Or maybe just a weak groan.
Common Causes & Solutions:
- Dead or Weak Battery (Electric Start Models):
- The Issue: Lead-acid batteries naturally discharge over time, especially if not maintained. A battery should read 12.6V or more. Anything less, and your starter motor might not get enough juice. Corrosion on terminals can also impede current flow.
- The Fix:
- Test the battery with a multimeter. If below 12.6V, try charging it. If it doesn't hold a charge, replace it.
- Clean corroded terminals thoroughly with a mixture of baking soda and water (a paste works well), then rinse and dry. Apply dielectric grease to prevent future corrosion.
- Pro Tip: Even if you have a pull start, a weak battery on an electric start model might prevent other systems (like the ignition module) from getting power.
- Fuel Follies: Insufficient, Old, or Contaminated Fuel:
- The Issue: Generators are picky eaters. No fuel, obviously, means no start. But old gasoline (anything over 30 days) is a notorious culprit. It degrades into varnish, clogging fuel lines and carburetors. Ethanol-blended fuels can also attract moisture, leading to phase separation and rust. Diesel users, beware: cold weather can cause fuel gelling.
- The Fix:
- Check Fuel Levels: Seems basic, but often overlooked.
- Drain Old Fuel: If your fuel is older than a month, drain it. Clean the tank if you see deposits, using carburetor cleaner for stubborn residue.
- Fresh Fuel: Always use fresh gasoline. For diesel, add anti-gel additives in winter.
- Preventative Measures: Use fuel stabilizers when storing the generator for more than a few weeks. Better yet, run the generator completely dry before long-term storage to prevent fuel degradation issues.
- Fouled or Damaged Spark Plugs:
- The Issue: Spark plugs ignite the air-fuel mixture. They can get caked with black/oily deposits (rich mixture, burning oil), appear white/blistered (overheating, lean mixture), or have broken porcelain (impact damage). Any of these conditions can prevent a strong spark.
- The Fix:
- Remove the spark plug. Visually inspect it.
- Test for Spark: Reconnect the spark plug wire, then ground the plug's metal body against a bare metal part of the engine (use insulated pliers for safety!). Pull the recoil cord or crank the engine. You should see a strong, blue spark. If not, the plug is likely bad or the ignition system has issues.
- Replace with the manufacturer-recommended plug (e.g., NGK BPR6ES is common for many small engines). Ensure the gap is correct.
- Low Engine Oil (Safety Shutdown):
- The Issue: Most modern generators have a low-oil sensor that prevents the engine from starting or running if oil levels are below a safe threshold. This protects the engine from catastrophic damage.
- The Fix:
- Check your oil dipstick. If low, refill to the recommended level (e.g., SAE 10W-30 for most temperate climates). Refer to your owner's manual for the exact type and capacity.
- Look for Contamination: If the oil appears milky, it could indicate coolant or water leakage, signaling a more serious internal issue.
- Faulty Starter Motor or Wiring (Electric Start):
- The Issue: If the battery is good but the starter motor doesn't engage, clicks, or just groans, the motor itself or its wiring could be the problem.
- The Fix: Inspect all wiring to the starter for loose connections or damage. If wiring is good, the starter motor may need repair or replacement. This often requires a professional touch.
Problem 2: The Jittery Performer – Starts, But Runs Rough
Your generator coughs to life, but then it surges, sputters, struggles under load, or just won't settle into a steady rhythm. This often points to fuel delivery or engine speed regulation issues.
Common Causes & Solutions:
- Clogged Carburetor Jets (The #1 Suspect):
- The Issue: For conventional carbureted models, a clogged carburetor is responsible for about 90% of erratic running problems. Old, varnished fuel (as mentioned above) is the primary culprit, leaving sticky deposits that block tiny fuel passages.
- The Fix:
- Carburetor Cleaning: This is a DIY-friendly task for many.
- Remove the carburetor (typically 3-5 bolts). Disconnect fuel lines.
- Carefully disassemble the carburetor, paying attention to the float bowl, jets, and needles.
- Soak metal components (jets, bowl, main body) in a carburetor cleaner like Berryman Chem-Dip for about 30 minutes.
- Use compressed air (under 30 PSI to avoid damaging delicate parts) to thoroughly blow out all passages, ensuring they are clear.
- Reinstall with new gaskets if available, as old gaskets can leak.
- Preventative: Use fuel stabilizer, and run the generator regularly or drain fuel for storage.
- Sticky Governor Arm or Worn Components:
- The Issue: The governor system (mechanical or electronic) is your generator's cruise control. It adjusts engine speed to match the electrical load, maintaining a consistent frequency. A sticky arm, worn throttle shaft bushings, or broken governor springs will cause engine speed (and thus power output) to fluctuate wildly.
- The Fix:
- Clean & Lubricate: Locate the governor arm and its pivot points. Clean any grime and lubricate (e.g., with WD-40 Specialist Lubricant) to ensure smooth movement.
- Inspect Components: Check for worn throttle shaft bushings or broken governor springs and replace them if necessary.
- Adjustment (Some Models): On some models (like certain Honda EU series), governor sensitivity can be adjusted via a specific screw. Consult your manual.
- Generator Undersized or Imbalanced Load:
- The Issue: Trying to pull more power than your 2500W generator can safely provide (especially during start-up surges from motors) will cause it to bog down and run erratically. An imbalanced load across circuits can also cause issues.
- The Fix:
- Load Management: Understand your appliances' rated watts vs. surge watts. Large motor loads (refrigerators, AC units) have high surge requirements.
- Balance Circuits: If your generator has multiple outlets, try to balance the load.
- Soft-Start Devices: Consider using soft-start capacitors for large motor loads to reduce their initial power draw.
- Other Mechanical Checks:
- Valve Clearances: Incorrect valve clearances (typically 0.003-0.005″ intake, 0.005-0.007″ exhaust for most small engines) can lead to poor compression and erratic running. This is a more advanced adjustment.
- Flywheel Key: A sheared flywheel key (often from sudden stops or impacts) can cause incorrect ignition timing, leading to rough running. This requires removing the flywheel to inspect and replace.
Problem 3: Power Fluctuations & Flickers – Low or Unstable Voltage Output / Frequency Instability
So, your generator starts and runs, but the lights dim, tools lack power, or sensitive electronics act strangely. This often points to issues with the generator's electrical output quality.
Common Causes & Solutions:
- Faulty Automatic Voltage Regulator (AVR):
- The Issue: The AVR maintains a consistent voltage output regardless of load. If it's faulty, voltage will sag, surge, or be unstable.
- The Fix: Inspect the AVR for obvious damage. If you suspect it's faulty, replacement is often the easiest solution, as they are typically sealed units.
- Loose or Damaged Electrical Connections / Corroded Terminals:
- The Issue: Loose wires or corrosion at any point in the electrical path (from the alternator to the outlets) can cause resistance, leading to voltage drops and intermittent power.
- The Fix:
- Tighten & Inspect: Carefully inspect all visible electrical connections, wires, and cables. Tighten any loose terminals. Look for frayed or burnt insulation.
- Clean Terminals: Before replacing any component, always clean all terminals. Using a contact cleaner like DeoxIT D5 can resolve up to 40% of "failed alternator" diagnoses that are actually just corroded connections.
- Dirty Alternator Windings or Worn Brushes:
- The Issue: Dust, grime, or even rodent nests can accumulate on the alternator windings, interfering with magnetic fields and heat dissipation. In brushed alternators, the carbon brushes wear down over time, leading to poor contact with the slip rings.
- The Fix:
- Clean Windings: Use compressed air to clean alternator windings.
- Replace Brushes: Inspect the carbon brushes. If they're worn down to less than half their original length (new brushes are often >1/2″, e.g., Generac 0J837701SRV brushes), replace them.
- Incorrect Load Distribution / Stator Winding Issues:
- The Issue: An imbalanced load on a multi-phase generator (less common for 2500W units, which are usually single-phase) can cause voltage irregularities. More seriously, internal damage to the stator windings can lead to intermittent power.
- The Fix:
- Balance Load: Ensure your load is evenly distributed if your generator has multiple circuits.
- Ohm Test Stator: For intermittent power, an ohm test of the stator windings should show between 0.2-0.5Ω. If readings are off or inconsistent, professional rewinding or replacement might be necessary.
- Engine Speed Deviations (Affects Frequency):
- The Issue: Electrical frequency (measured in Hertz, Hz) is directly tied to engine speed. If the engine isn't maintaining a steady RPM, the frequency will fluctuate, which can harm sensitive electronics.
- The Fix:
- Monitor Frequency: Use a Kill-A-Watt meter to monitor real-time frequency. At no load, expect 61-62Hz. Under full load, it should never drop below 58Hz.
- Governor Adjustment: Refer back to the governor system troubleshooting. A properly functioning governor is key to stable frequency.
- Inverter Generators: For inverter generators, frequency problems can indicate failed MOSFETs in the power module, especially after extensive use (e.g., Honda EU2200i after 3,000+ hours). This is a complex repair best left to specialists.
Problem 4: Feeling the Heat – Overheating of Generator
An overheating generator isn't just inefficient; it's dangerous and can lead to serious component failure.
Common Causes & Solutions:
- Blocked or Dirty Cooling System:
- The Issue: Just like a car, your generator needs airflow to cool its engine and alternator. Debris, dirt, leaves, or even rodent nests can block cooling fins or air intakes.
- The Fix: Regularly inspect and clean the radiator, cooling fins, and air intakes. Ensure the generator is placed in an area with ample, unobstructed airflow.
- Low Coolant or Engine Oil Levels:
- The Issue: Insufficient fluids mean insufficient heat transfer.
- The Fix: Check and refill coolant (if applicable) and engine oil to the manufacturer's recommended levels.
- Overloading Beyond Rated Capacity:
- The Issue: Pushing your 2500W generator to run more appliances than it's designed for will make it work harder, generate more heat, and potentially trip breakers or damage components.
- The Fix: Reduce the load. Calculate the total running watts of your appliances and ensure it stays within your generator's continuous running watt capacity, not just surge watts.
Problem 5: Guzzling Gas? – Excessive Fuel Consumption
If your 2500W generator is burning through fuel faster than usual, your wallet (and the environment) will feel it.
Common Causes & Solutions:
- Fuel Leaks:
- The Issue: Obvious, but easily missed. A small leak in a fuel line, tank, or carburetor can lead to significant fuel loss over time.
- The Fix: Carefully inspect all fuel lines, the fuel tank, and the carburetor for any signs of leaks (drips, wet spots, or the smell of fuel). Repair or replace damaged components immediately.
- Worn-Out Injectors (Diesel/EFI Models) or Poor Engine Tuning:
- The Issue: Fuel injectors that are clogged or not atomizing fuel correctly will lead to incomplete combustion and wasted fuel. Incorrectly tuned engine settings can also be inefficient.
- The Fix: If you have an EFI model, faulty injectors may need to be replaced. For carbureted models, ensure the carburetor is clean and properly adjusted. Professional calibration of engine settings can optimize fuel efficiency.
- Operating at Low Load Levels for Extended Periods:
- The Issue: While it might seem counterintuitive, running a generator at a very low load for too long (under 30-40%) can lead to "wet stacking" or carbon buildup, reducing efficiency and potentially causing damage. The engine isn't working hard enough to burn fuel completely.
- The Fix: Try to operate your generator at its optimum load, generally between 70–80% of its rated capacity, for best fuel efficiency and engine health.
Problem 6: The Unwanted Rattle & Roll – Unusual Noise or Vibrations
A working generator makes noise, but new or unusual sounds (clunks, grinding, squeals, excessive shaking) are red flags.
Common Causes & Solutions:
- Loose Mountings:
- The Issue: Engine or alternator mounting bolts can loosen over time due to vibration, leading to rattling and increased vibration.
- The Fix: Inspect all mounting bolts for the engine and alternator. Tighten them to the manufacturer's specified torque.
- Worn Bearings:
- The Issue: Bearings in the engine or alternator can wear out, causing a grinding or whining noise. If you can feel more than 1mm of lateral movement in shafts, bearings are likely worn.
- The Fix: This is a more involved repair, often requiring specialized tools to press out and replace bearings.
- Damaged Belts or Pulleys (if applicable):
- The Issue: Some generators use belts (e.g., for cooling fans or certain alternator designs) that can stretch, fray, or crack. Pulleys can also become misaligned or worn.
- The Fix: Inspect all belts and pulleys for wear or damage. Replace any faulty components. Ensure belts are properly tensioned.
- Internal Mechanical Faults:
- The Issue: Persistent clunking or grinding noises from within the engine itself can indicate serious internal damage (e.g., connecting rod, crankshaft, piston issues).
- The Fix: For internal mechanical faults, it's best to call a qualified service technician. Attempting DIY repair without expertise can worsen the problem.
Problem 7: Smoke Signals – What Exhaust Smoke Tells You
The color of your generator's exhaust smoke is a powerful diagnostic clue.
Common Causes & Solutions:
- Black Smoke:
- The Issue: Indicates incomplete fuel combustion. The engine is getting too much fuel or not enough air.
- Causes: Dirty air filter (restricting airflow), faulty fuel injectors (spraying too much fuel), or overloading the generator.
- The Fix:
- Clean or replace the air filter.
- Service the fuel system (clean carburetor, check injectors if applicable).
- Avoid overloading the generator.
- White Smoke:
- The Issue: Often indicates that something other than just fuel is burning, or that fuel isn't burning properly at all.
- Causes: Low cylinder compression (worn rings/valves), coolant leakage into the combustion chamber (blown head gasket), or unburnt fuel passing through the exhaust due to ignition issues.
- The Fix:
- Inspect the coolant system for leaks (if your generator is liquid-cooled).
- Conduct a compression test (see "Advanced Diagnostic Techniques" below) to assess engine health. If compression is low and doesn't improve with a wet test, internal engine repair is needed.
- Check for strong spark and proper ignition timing.
Keeping Your Powerhouse Healthy: Essential Maintenance Routines
Prevention is always better than cure. Regular maintenance keeps your 2500W generator reliable and extends its lifespan.
Essential Maintenance Schedule (Whichever Comes First):
- Every 50 Hours / 3 Months:
- Check Oil: Level and condition. Change if it appears dark or milky (milky indicates water/coolant).
- Inspect Air Filter: Clean with compressed air or replace if damaged.
- Test Battery Voltage: For lead-acid types, ensure 12.6V minimum.
- Every 100 Hours / 6 Months:
- Replace Fuel Filter: A fresh filter ensures clean fuel delivery.
- Clean Spark Arrestor: For portable units, this prevents carbon buildup and maintains exhaust flow.
- Check Electrical Connections: Inspect all for corrosion, especially the main output terminals.
- Every 200 Hours / Annually:
- Drain & Replace All Fluids: Engine oil, and coolant if applicable.
- Clean Fuel Tank: Inspect for rust or sediment buildup.
- Load Bank Test: Essential for standby generators to ensure they can carry their full rated load.
Advanced Procedures & Storage Best Practices:
- Valve Lash Adjustment: Typically annually or every 200-300 hours. Clearances of 0.003-0.005″ for intake and 0.005-0.007″ for exhaust are common for small engines.
- Fuel System Preservation: Before long-term storage, fill the tank 95% full with fuel treated with a high-quality stabilizer. Run the generator for 10 minutes to circulate the treated fuel.
- Battery Management: Disconnect the negative battery terminal and use a smart charger to maintain charge without overcharging.
- Moisture & Pests: Place moisture absorbers inside the control panel. Install ultrasonic repellents and stuff steel wool into exhaust openings to deter rodents who love generator wiring.
- Standby Generators: Monthly 30-minute test runs under at least 50% load are critical to keep seals lubricated and ensure readiness.
Beyond the Basics: Safety First & Environmental Stewardship
Operating a generator carries significant responsibilities, both for your safety and the environment.
Critical Safety Protocols:
- Carbon Monoxide (CO) Risks: This is non-negotiable. CO is an odorless, colorless killer, responsible for 400+ generator-related deaths annually in the US.
- Placement: ALWAYS place your generator 20+ feet from any building, with the exhaust pointed away from windows, doors, and air intakes. Never run it in a garage, even with the door open.
- Alarms: Install battery-powered CO alarms on every level of your home. Low-level CO monitors (detecting less than 30 ppm) offer earlier warnings.
- Automatic Shutoff: Consider generators with CO-detecting automatic shutoff systems, like Generac’s COsense®.
- Electrical Safety – Preventing Backfeed: Improper connections can send electricity back into the utility grid, endangering utility workers and neighbors.
- Transfer Switches: Use a professionally installed transfer switch (30A models are common for homes using 2500W generators) to safely connect your generator to your home's electrical system.
- NEVER Backfeed: Absolutely never connect your generator directly to a dryer outlet or any other appliance outlet using a "suicide cord." This is incredibly dangerous.
- Grounding: Portable generators must be properly grounded. For permanent installations, use an 8′ copper-clad grounding rod placed within 6′ of the generator, connected with #6 AWG copper wire. Even modern inverter generators, despite their "floating neutral" design, require proper grounding for sensitive electronics.
- Interlock Kits: If using a panel-mounted transfer system, ensure an interlock kit is installed to prevent simultaneously powering the main breaker and the generator input breaker.
Environmental Best Practices:
- Fuel Choices:
- Propane: If your generator is dual-fuel or propane-only, consider using propane. It burns significantly cleaner, producing up to 50% less carbon monoxide than gasoline.
- Biodiesel: For diesel units, biodiesel blends (B20) can reduce particulate matter emissions.
- Emissions Control: Regularly clean spark arrestors to maintain emission control effectiveness. When purchasing, look for CARB-compliant models if you're in California or other states that adopt these stricter standards.
- Noise Pollution: Inverter generators are dramatically quieter (53-58 dB) compared to conventional open-frame models (68-72 dB). If noise is a concern for you or your neighbors, an inverter generator is worth the investment.
- Professional Recommendation: For medical equipment or highly sensitive electronics, invest in UL 2200-certified generators with less than 1% Total Harmonic Distortion (THD) to ensure the cleanest power.
Stepping Up Your Game: Advanced Diagnostics for Tricky Troubles
Some problems require digging deeper than visual checks. Here are a few advanced techniques.
- Compression Testing:
- When: If you suspect internal engine wear, like worn piston rings or valves.
- How: Warm the engine for 10 minutes. Remove all spark plugs. Disable the fuel system (e.g., by disconnecting the fuel line or fuse). Thread the compression gauge into a spark plug hole. Crank the engine 4-5 revolutions.
- What to Look For: A healthy range is typically 90-110 PSI. Variation between cylinders (if applicable) should be ≤10%.
- Wet Test: If compression is low, add about 1 teaspoon of oil into the cylinder, then re-test. If compression rises by 15-20%, worn piston rings are the likely culprit.
- Stator and Rotor Testing:
- When: If you have low or no power output and have ruled out AVR and brush issues.
- How:
- Stator Windings: Disconnect the stator from the AVR. Use a multimeter on the ohms setting to measure resistance between the main output leads. Expect 0.2-0.5Ω. Significant deviation or an open circuit indicates a fault.
- Rotor (Field Coil): Measure the resistance of the rotor's field coil (where the brushes make contact). This is typically 10-25Ω. An open circuit means the rotor coil is broken.
- Diodes (if applicable): Some generators use diodes. Test them in diode mode on a multimeter (expect 0.3-0.7V forward bias, "OL" reverse bias).
- Fuel Injection System Diagnostics (for EFI models):
- When: If you have fuel delivery issues on an Electronic Fuel Injection system.
- How:
- Fuel Pressure Test: Connect a fuel pressure gauge to the fuel rail. Expect 35-45 PSI.
- Injector Pulse Test: Use a "noid light" to check if the Engine Control Unit (ECU) is sending signals to the injectors.
- Error Codes: Many EFI generators have diagnostic ports. Check for "blink codes" (patterns of flashing lights) or use an OBD reader if available.
- Tips: Always use dielectric grease on electrical connectors for the EFI system. A graphing multimeter can help diagnose transient voltage drops in sensors or wiring.
- Advanced Load Testing:
- When: To thoroughly assess generator performance under various demands.
- How: Gradually apply load in 10% increments using a resistive load bank.
- What to Monitor:
- Voltage Drop: Should not exceed 5% at full load.
- Frequency Stability: Should remain between 58-62Hz.
- Exhaust Gas Temperature (EGT): At full load, expect 800-1100°F (use an EGT probe).
- Early Detection: Consider infrared thermography to spot hot spots (loose connections, failing components) or oil analysis to detect early signs of engine wear.
Optimizing for Peak Performance: Fine-Tuning Your 2500W Workhorse
Once you've fixed the immediate problems, you can take steps to optimize your generator's long-term performance and efficiency.
- Performance Tuning:
- Air-Fuel Mixture: For carbureted units, a slight adjustment (e.g., 1/8 turn increments on the mixture screw) can improve fuel economy by 5-10% and smooth out running.
- Governor Droop Setting: For standby units, a 3-5% droop setting helps maintain ±0.5Hz frequency stability under varying loads.
- Voltage Regulator Calibration: Calibrate the voltage regulator to the nameplate voltage (e.g., 120/240V ±2%) for optimal output.
- Cooling System Enhancements:
- Auxiliary Coolers: If operating in consistently hot environments (above 90°F), consider adding auxiliary oil coolers.
- Thermal Imaging: Quarterly thermal imaging scans can proactively identify heat issues.
- Coolant Additives: For liquid-cooled units, additives like "water wetter" can improve heat transfer by up to 20%.
- Load Management Strategies:
- Balance Single-Phase Loads: Aim to balance loads within 10% across different phases/circuits.
- Sequence Heavy Starts: Stagger the startup of heavy motor loads with 30-second delays to avoid simultaneous surge demands.
- Optimal Loading: Always strive to maintain a 30-80% load for the best fuel efficiency and longevity.
- Predictive Maintenance:
- Quarterly Oil Analysis: Sending oil samples for analysis can detect wear metals (e.g., iron >100ppm indicates bearing wear) and coolant contamination before major failures occur.
- Vibration Analysis: Specialized tools can detect abnormal vibrations indicating component wear.
- Annual Infrared Scanning: For electrical connections, this spots loose connections or developing hot spots.
- Quality Assurance Protocols:
- Burn-in Test: After any significant repair or for new installations, conduct a 72-hour burn-in test at 50% load.
- Step-Load Test: Periodically perform a step-load test, increasing load from 0-100% in 25% increments, monitoring voltage and frequency at each step.
- Harmonic Distortion: Measure harmonic distortion (<5% THD is critical for sensitive equipment).
- ATS Cycle Testing: For standby units, perform automatic transfer switch (ATS) cycle testing (minimum 10 successful transfers) to ensure seamless power transitions.
- N+1 Redundancy: For mission-critical applications, consider using parallel generators (N+1 redundancy) with automatic load sharing for ultimate reliability.
The Bottom Line: Don't Get Left in the Dark
A 2500-watt electric generator is an investment in peace of mind. By understanding its common quirks, diligently following maintenance schedules, and adhering to strict safety protocols, you can ensure it's always ready to perform when you need it most. Don't wait for the next outage to find out your generator has a problem. Stay proactive, follow this guide, and keep your power flowing smoothly.